OpenAI offers access to its AI models through numerous APIs, but one stands out for its capabilities above the rest. That is, without a doubt, the Assistant API, which allows you to integrate an AI assistant into your application, script, or any similar project, whether small or large. For chatting with documents, analyzing data on your e-commerce site, or any other type of automation, this API will get the job done.
Table of contents
Chat with documents
At first glance, it might not sound too exciting, but imagine your company having a pile of documents used for onboarding new employees or other purposes. These documents can be extremely long or contain information that isn't relevant to everyone. If you had the option to interact with the information in these documents through a chat window, it would make finding the right details much easier—not just for new employees but likely for current ones as well.
Traditionally, such an application would be built using a RAG (Retrieval-Augmented Generation) approach, which requires additional infrastructure to ensure the application functions properly. This usually involves writing extra code to ingest document content, chunk it, create embeddings, and store them in a vector database such as Qdrant. Or using existing frameworks created specifically for this type of task, which have a high learning curve and are not easy to master, such as Llama Index.
With OpenAI's Assistant API, this process can be significantly simplified. OpenAI handles the ingestion of information from documents into a vector database, which they also host. All you need to do is upload the file to their platform, and they take care of the rest. I tried uploading .txt, .docx, and .pdf files, and they all work great. However, OpenAI supports more file types. This greatly simplifies using RAG, especially for simple projects where you don't want to deal with setting up and maintaining a vector database.
The downside is that OpenAI charges for storing files on their platform, but this cost is often offset by the time saved from not having to configure and maintain the database yourself. Even if you were to use a managed vector database like Pinecone, you'd still face costs. In this case, using OpenAI's solution can be a more efficient and streamlined choice.
The other downside is that the data is not under your control and is stored in the cloud. Therefore, if you have sensitive data, you should be careful and decide whether storing it in the cloud is a good idea. Individual files you upload to OpenAI can be up to 512 MB, and the total size of all uploaded files can be up to 100 GB.
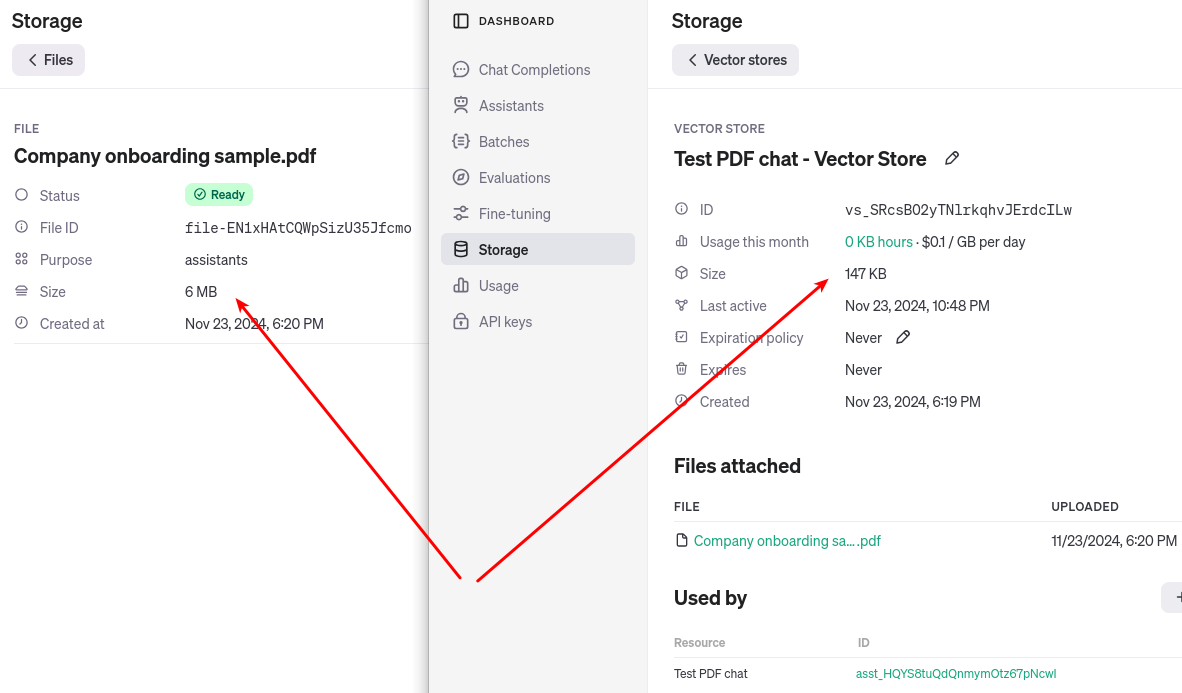
The cost of storing information with OpenAI is currently $0.10 per GB, with the first 1 GB being free. Interestingly, the pricing isn't based on the size of the file you upload but rather on the amount of space the extracted information occupies in the vector database. Take a look at the screenshot from the OpenAI playground, and you'll see that my test PDF document is 6 MB in size, but the information extracted from it, once converted into vectors and stored in the vector database, only takes up 147 KB of space.
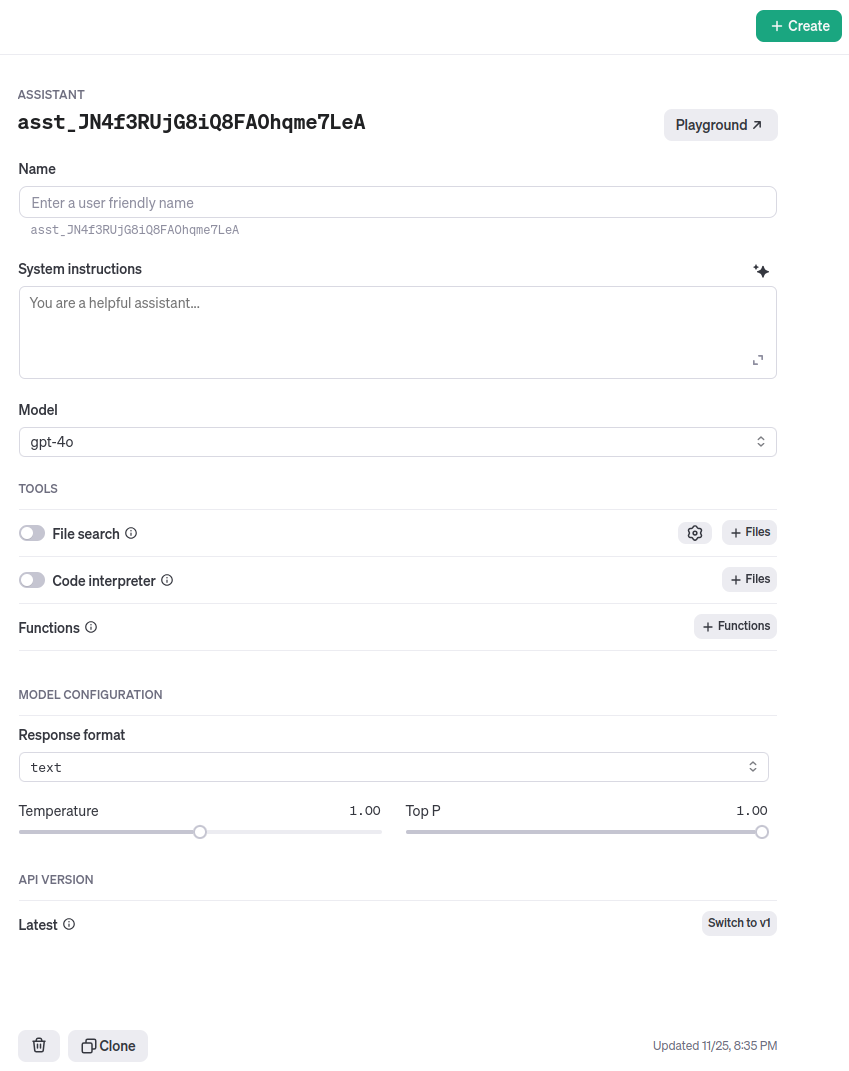
The OpenAI Playground allows you to review all the AI assistants you've created, view all the files you've uploaded, track your usage, and much more. That's why it's extremely important to familiarize yourself with this tool.
From a programming perspective
On one hand, using this API significantly simplifies building a RAG application, but on the other hand, the API isn't easy to use. What I mean by that is there are a lot of moving parts that all need to be coordinated. This API isn't like, for example, a Chat API where you basically send a question and get an answer. Here, you have to do much more, especially if everything is handled programmatically.
Let's use pseudocode to see how it works. Start by creating a vector store and retrieving the vector store ID:
vector_store_id = createVectorStore(name);This vector store will contain our vector data. Now, we can upload a file:
file_id = uploadFile(file);and then attach it to the previously created vector store:
attachFileToVectorStore(file_id, vector_store_id);Now, we can create an assistant. For that, we need a name, the name of the model we want to use, instructions for the model, tools and tool resources:
assistant_id = createAssistant(name, model, instructions, tools, tool_resources);The tool we are using in our case is file_search, and we have to specify the tool's resources that the file_search tool can use. In our case, that is just the vector store we previously created.
This is what we need to do to create our assistant and give it access to the file we uploaded. We can now start creating so-called threads, which you can imagine as new chat windows, and begin adding messages to them.
thread_id = createThread();We can now add a message to this thread:
message = [
  "role" => "user",
  "content" => "How many vacation days do we have annually?"
]

createMessage(thread_id, message);
and the final step is to run the thread:
runThread(assistant_id, thread_id);This operation is asynchronous, so we need to call the API repeatedly until the run status is marked as completed. Usually, the results of the run are quickly available, taking about as long as it would for ChatGPT to generate a full response to a similar question. Then, it is possible to retrieve information from the thread that the AI model added as messages:
messages = getListOfMessagesForThread(thread_id);where the messages array will contain both the user's message and the assistant's response:
message = [
  [
    "role" => "assistant",
    "content" => "You have 25 vacation days available annually."
  ],
  [
    "role" => "user",
    "content" => "How many vacation days do we have annually?"
  ],
]
As you can see, there are quite a few steps to reach the answer, but the advantage is that all you need to do is call the APIs correctly. Everything else is handled by OpenAI. Each thread is saved in OpenAI's cloud, along with all associated messages, so there's no need for you to store this or manage the message state when users add consecutive messages.
Depending on how dynamic your application needs to be, some of these steps don't have to be done via the API—you can use the OpenAI Playground instead. For example, creating a vector store, uploading files, and adding them to the vector database, as well as creating and configuring the assistant, can all be done by simply clicking through the Playground interface.
Overall, the Assistant API offers a flexible way to build interactive applications, not just for chatting with documents but for many other tasks as well. It also supports features like code interpretation and the ability to call external APIs through functions, expanding what you can do with your assistant. So whether you're building a simple chatbot or a complex automation tool, the Assistant API provides the building blocks you need.


