In my previous blog post, I was writing about running Functional tests if you are using Docker4Drupal. In this follow-up article, I will write about running another type of test -- Functional Javascript tests.
Running Functional Javascript tests is a little bit more complicated than running just Functional tests. Why is that? Well, because Functional Javascript tests need a browser. These tests are executed in a real browser, and since Docker4Drupal doesn't have a browser service included, you will have to add it yourself.
Drupal.org CI test bot is using Chrome driver, so it only makes sense that we use the same thing for local testing. Edit your docker-compose.yml file and add the following lines:
chrome:
    image: drupalci/webdriver-chromedriver:production
    ulimits:
      core:
        soft: -1
        hard: -1
    cap_add:
      - SYS_ADMIN
    volumes:
      - /dev/shm:/dev/shm
    entrypoint:
      - chromedriver
      - "--no-sandbox"
      - "--log-path=/tmp/chromedriver.log"
      - "--verbose"
      - "--whitelisted-ips="
You can now bring your project to life by executing:
docker-compose up -d
Since you probably don't have this image downloaded to your local machine, you will have to wait a little bit depending on the speed of your internet connection.
Changing the docker-compose file is not the only thing that you have to do. You also have to modify the phpunit.xml file. You must add an environmental variable called MINK_DRIVER_ARGS_WEBDRIVER that points to the browser. Your phpunit.xml file will look something like this in the end:
<?xml version="1.0" encoding="UTF-8"?>

<phpunit bootstrap="tests/bootstrap.php" colors="true"
         beStrictAboutTestsThatDoNotTestAnything="true"
         beStrictAboutOutputDuringTests="true"
         beStrictAboutChangesToGlobalState="true">

  <php>
    <ini name="memory_limit" value="-1"/>
    <ini name="error_reporting" value="32767"/>
    <env name="SIMPLETEST_BASE_URL" value="http://nginx"/>
    <env name="SIMPLETEST_DB" value="mysql://drupal:drupal@mariadb/drupal"/>
    <env name="BROWSERTEST_OUTPUT_DIRECTORY" value="/var/www/html/web/sites/default/files/simpletest/browser_output"/>
    <env name="MINK_DRIVER_ARGS_WEBDRIVER" value='["chrome", {"browserName":"chrome","chromeOptions":{"args":["--disable-gpu","--headless"]}}, "http://chrome:9515"]'/>
  </php>

</phpunit>
This is what you must have to be able to run both Functional and Functional Javascript tests with Docker4Drupal. In my blog post about Functional tests I said that you should copy and rename phpunit.xml.dist file that is located in the core folder of your Drupal instance. But, if you want to avoid losing this file when you update Drupal core with Composer, then it might be better if you move it out of the core directory and place it in the root of your project.
If you do that, you will have to update the bootstrap attribute inside phpunit.xml file, and set it to something like this:
bootstrap="web/core/tests/bootstrap.php"
If you are not using the Composer template for Drupal projects, or if your Drupal instance is not in the web directory please change the value to your real path.
And that's it. You can now enter the PHP container and execute your first Functional Javascript test. If you moved phpunit.xml file to the root directory of your project use these commands:
docker-compose exec php bash
vendor/bin/phpunit web/core/modules/config/tests/src/FunctionalJavascript/ConfigEntityTest.php
and if you didn't move it, make sure to add -c web/core option:
docker-compose exec php bash
vendor/bin/phpunit -c web/core web/core/modules/config/tests/src/FunctionalJavascript/ConfigEntityTest.php
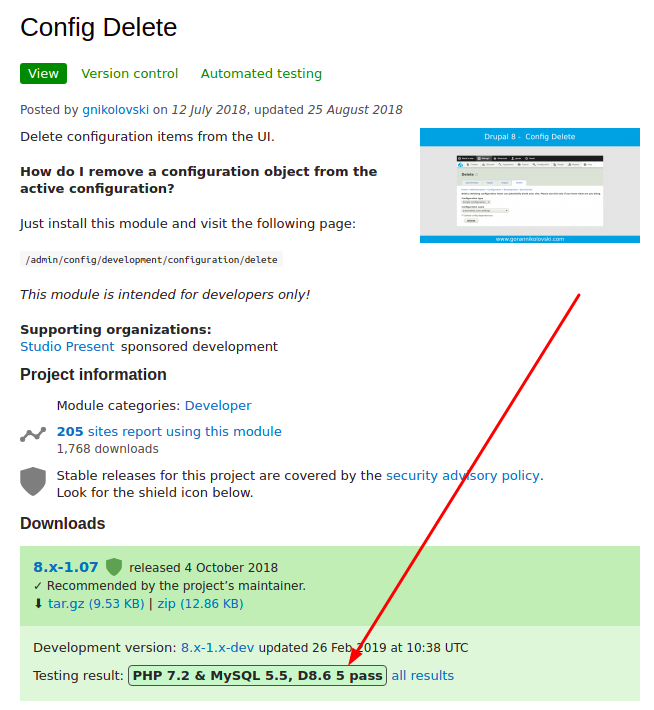
I recently added both Functional and Functional Javascript test to my Config Delete module. If you want to see how all that looks like here it is:
Drupal.org is automatically executing these tests and showing results on the module page. This is how that looks like:
Having good test coverage for a module is really important if you plan to maintain it in the future and add more features. You don't want to break something that already works when you add a new feature, especially if hundreds of websites depend on your module.


