


Dive into my comprehensive guide and discover how to harness the power of Google Tag Manager for your WooCommerce store on WordPress. Master the step-by-step process of capturing essential ecommerce events using Google Analytics 4 to gain deeper insights into user behavior and optimize your sales funnel.
1. Install & configure the GTM4WP Plugin
To track ecommerce events for your WooCommerce store, the first step is to install the GTM4WP plugin. This plugin provides the essential events in the dataLayer for tracking your store's performance.
The plugin tracks the following events:
- view_item
- view_item_list
- select_item
- add_to_cart
- remove_from_cart
- add_payment_info
- add_shipping_info
- view_cart
- begin_checkout
- purchase
After installing and activating the plugin, go to its settings page (Settings -> Google Tag Manager). Under the General tab, input your GTM code into the Google Tag Manager ID box. Make sure that Container code ON/OFF is set to ON. This will install the Google Tag Manager snippet on your website.

To enable tracking ecoomerce data, go to the Integration tab and then click on the WooCommerce secondary tab and check the Track enhanced e-commerce checkbox.

That should complete the setup on the web store side. Your web store should now be tracking e-commerce events. To confirm its functionality, proceed to the next step. If you're confident it's working properly, move on to Step #2.
1.1. Check if events are present in the data layer (this step is optional)
Navigate to a product page and then open the browser's console by pressing F12. Next, click on the Console tab and type dataLayer, then press Enter. Expand the dataLayer variable and check for a view_item event. Also, check for related item data, such as currency and value (price).

You can apply the same method for all other events. For example, try adding something to the cart and then check the dataLayer variable in the console to see if there's an add_to_cart event. Similarly, navigate to the Cart page and verify if a view_cart event has been dispatched.

To set the currency for your WooCommerce store, go to WooCommerce > Settings > General > Currency Options and select Currency.
2. Configure Google Tag Manager
2.1. Import Google Tag Manager container template
The GTM4WP plugin's creator has simplified step #2 for us. Instead of manually setting up tags, triggers, and variables for ecommerce tracking, simply import the given JSON file. It will automatically create the necessary variables, triggers, and tags for you.
Download the provided JSON file (right-click and save) and edit it. Search for the placeholder {REPLACE THIS} and replace it with your Google Analytics 4 stream measurement ID. Make sure to remove the curly brackets.
To find the Measurement ID in Google Analytics 4, click on the Admin link, represented by a gear icon, at the bottom left corner. Once there, in the Property column, select Data Streams. From there, choose a web data stream. A new window will then open, and in the top-right column, you'll identify a Measurement ID that begins with G-.

Next, navigate to Google Tag Manager UI. Open Admin, then Container, and select Import Container. Follow the steps to import the file.
For optimal results, it's best to have an empty workspace without any tags, triggers, or variables. However, if you already have some in place, no worries! You can merge or overwrite them, or simply create a new workspace during import.

If you have existing tags, triggers, and variables, you may need to overwrite or merge them, or create a new workspace. However, it's best to start with no tags, triggers, or variables. Doing so ensures the Preview and confirm your import tables only display new items for import.

Tags page comparison, before and after importing the container template:

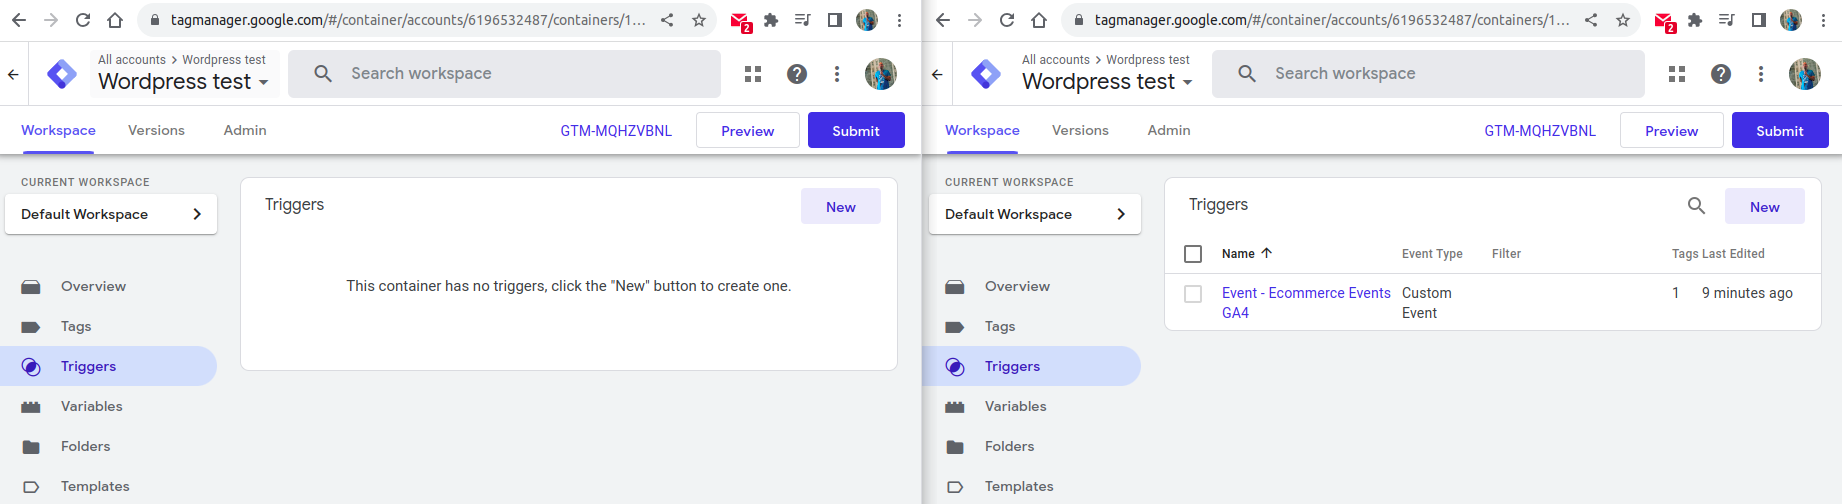
Triggers page comparison, before and after importing the container template:
Variables page comparison, before and after importing the container template:

We're almost finished. The only remaining step is to configure the Google Tag.
To send event data from Google Tag Manager to Google Analytics 4, you need two tags:
- Google Tag - this tag establishes the data flow from your website to Google Analytics 4
- Google Analytics: GA4 Event - this tag helps you track website events (this is created automatically by importing the container template)
2.2. Configure Google tag
Navigate to the Tags page in GTM. Click on the GA4 - Event - Ecommerce events link. Then, click the No Google tag found in this container warning.

Proceed to click Create tag button and save the tag you've created.

You can also manually create a new Google Tag without relying on the Create tag button. To do this, navigate to the Tags page and click the New button located at the top right corner. From there, select the Google Analytics / Google Tag tag type and input your Measurement ID. For triggering, choose Initialization - All Pages.

The completed GTM setup will display two configured tags.

So, with that done, you're all set to see how your WooCommerce shop is doing. I hope this guide was easy to follow and helps you out. Thanks for reading, and if you have questions, just drop a message. See you in the next post, and good luck with your store!
About the Author

Goran Nikolovski is a senior developer with over 10 years of experience turning ideas into scalable digital products—from web platforms and mobile apps to AI-powered tools. He is passionate about clean code, creative problem-solving, and shaping the future of digital development.