In my previous article, I explained how to integrate the Facebook Pixel with a Drupal webform. I used the Simple Facebook Pixel module to send the purchase event to Facebook. In this article, we are going to see how to send the purchase event by using Google Tag Manager (GTM).
If you don't already have the Google Tag Manager module installed, you can install it with Composer:
composer require drupal/google_tag
To use the module, sign up for GTM, get your Container ID, and configure the module. You can find the instructions for module configuration here.
Once we have the GTM module configured on our website, we can create a new tag in Google Tag Manager.
But before we do that, we have to create a data layer, which will contain all information about the purchase. The data layer has to be injected into the HTML after the user makes a purchase.
To inject the data layer we can use the hook_page_attachments() like this:
use Drupal\Component\Serialization\Json;

function MY_MODULE_page_attachments(array &$page) {
  $data_layer_service = \Drupal::service('MY_MODULE.data_layer_service');
  $data = $data_layer_service->getData();

  if (!empty($data)) {
    $page['#attached']['html_head'][] = [[
      '#tag' => 'script',
      '#value' => "window.dataLayer = window.dataLayer || []; dataLayer.push({'event': 'purchase', 'ecommerce': " . Json::encode($data) . "});",
    ],
      'MY_MODULE_data_layer',
    ];
  }
}
Now let's create the data_layer_service service that acts as a middleman between the hook_page_attachments() and a Webform handler. This is a simple service that uses PrivateTempStore to make temporary data available across requests.
We need the MY_MODULE.services.yml file:
services:
  MY_MODULE.data_layer_service:
    class: Drupal\MY_MODULE\DataLayerService
    arguments: ['@tempstore.private']
and the src/DataLayerService.php file:
<?php

namespace Drupal\MY_MODULE;

use Drupal\Core\TempStore\PrivateTempStoreFactory;

class DataLayerService {

  /**
   * The private temp store.
   *
   * @var \Drupal\Core\TempStore\PrivateTempStoreFactory
   */
  protected $privateTempStore;

  /**
   * DataLayerService constructor.
   *
   * @param \Drupal\Core\TempStore\PrivateTempStoreFactory $private_temp_store
   *   The private temp store.
   */
  public function __construct(PrivateTempStoreFactory $private_temp_store) {
    $this->privateTempStore = $private_temp_store->get('MY_MODULE');
  }

  /**
   * Adds data about event.
   *
   * @param array $data
   *   The event data.
   */
  public function addData(array $data) {
    $this->privateTempStore->set('data', $data);
  }

  /**
   * Gets data about event.
   */
  public function getData() {
    $data = $this->privateTempStore->get('data');
    $this->privateTempStore->delete('data');
    return $data;
  }

}
Finally, we can create the Webform handler (placed inside Plugin/WebformHandler directory) that will use the Data layer service to store information about the purchase.
<?php

namespace Drupal\MY_MODULE\Plugin\WebformHandler;

use Drupal\commerce_product\Entity\ProductInterface;
use Drupal\webform\Plugin\WebformHandlerBase;
use Drupal\webform\WebformSubmissionInterface;
use Symfony\Component\DependencyInjection\ContainerInterface;

/**
 * Inserts data layer on a webform submission.
 *
 * @WebformHandler(
 *   id = "data_layer",
 *   label = @Translation("Data layer"),
 *   category = @Translation("Action"),
 *   description = @Translation("Inserts data layer on a webform submission."),
 *   cardinality = \Drupal\webform\Plugin\WebformHandlerInterface::CARDINALITY_UNLIMITED,
 *   results = \Drupal\webform\Plugin\WebformHandlerInterface::RESULTS_PROCESSED,
 *   submission = \Drupal\webform\Plugin\WebformHandlerInterface::SUBMISSION_REQUIRED,
 * )
 */
class DataLayerWebformHandler extends WebformHandlerBase {

  /**
   * The route match.
   *
   * @var \Drupal\Core\Routing\RouteMatchInterface
   */
  protected $routeMatch;

  /**
   * The data layer service.
   *
   * @var \Drupal\MY_MODULE\DataLayerService
   */
  protected $dataLayerService;

  /**
   * {@inheritdoc}
   */
  public static function create(ContainerInterface $container, array $configuration, $plugin_id, $plugin_definition) {
    $instance = parent::create($container, $configuration, $plugin_id, $plugin_definition);
    $instance->routeMatch = $container->get('current_route_match');
    $instance->dataLayerService = $container->get('MY_MODULE.data_layer_service');
    return $instance;
  }

  /**
   * {@inheritdoc}
   */
  public function postSave(WebformSubmissionInterface $webform_submission, $update = TRUE) {
    /** @var \Drupal\commerce_product\Entity\ProductInterface $product */
    $product = $this->routeMatch->getParameter('commerce_product');

    if ($product instanceof ProductInterface) {
      $submission_data = $webform_submission->getData();

      /** @var \Drupal\commerce_product\Entity\ProductVariationInterface $product_variation */
      $product_variation = $product->getDefaultVariation();

      $unit_price = (float) $product_variation->getPrice()->getNumber();
      $quantity = (int) $submission_data['quantity'];
      $total_price = $unit_price * $quantity;

      $skus[] = $product_variation->getSku();

      $contents[] = [
        'id' => $product_variation->getSku(),
        'quantity' => $quantity,
        'item_price' => $product_variation->getPrice()->getNumber(),
      ];

      $data = [
        'num_items' => $quantity,
        'content_type' => 'product',
        'value' => $total_price,
        'currency' => $product_variation->getPrice()->getCurrencyCode(),
        'content_ids' => $skus,
        'contents' => $contents,
      ];

      $this->dataLayerService->addData($data);
    }
  }

}
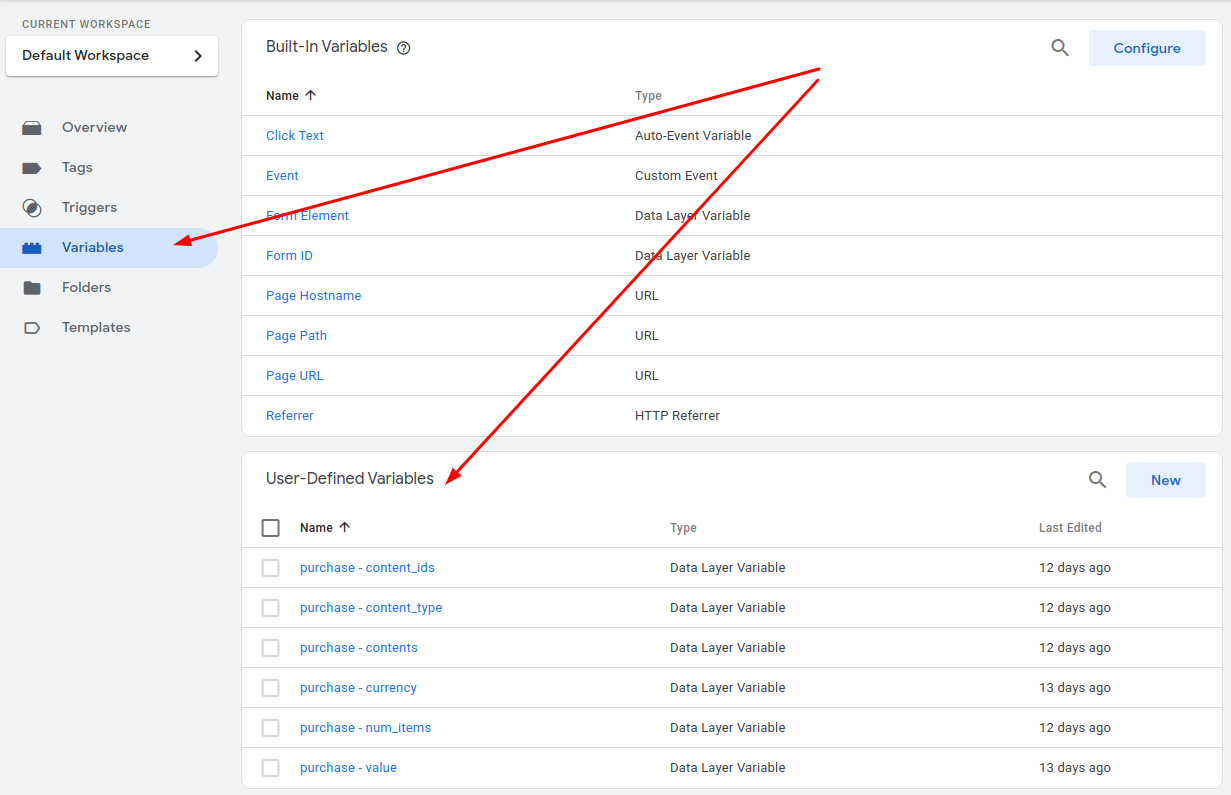
Go back to Google Tag Manager and define new custom variables for all $data array keys.
We have the following Data layer variables:
ecommerce.num_items
ecommerce.content_type
ecommerce.value
ecommerce.currency
ecommerce.content_ids
ecommerce.contents
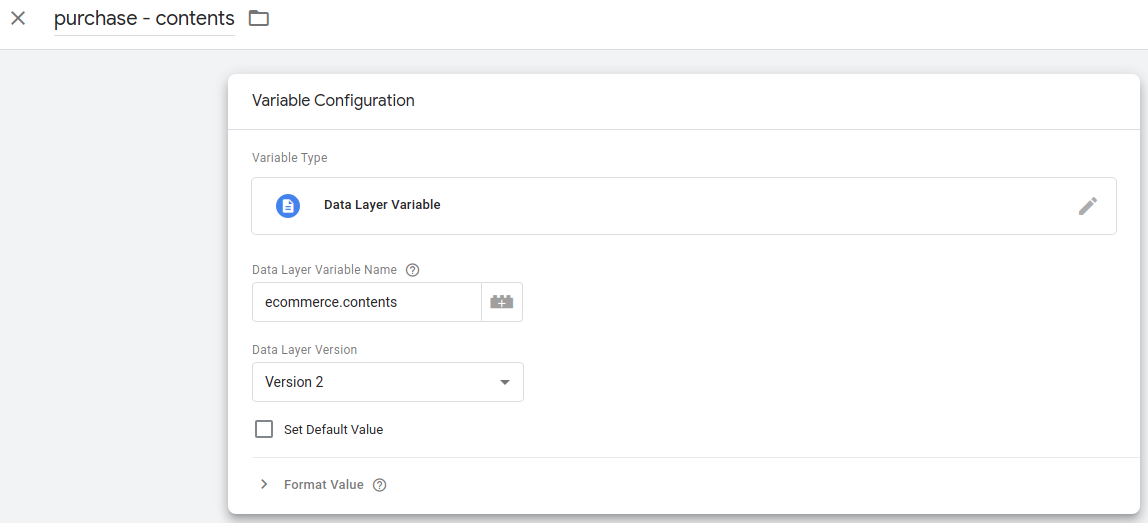
An example of how a variable looks like in GTM:
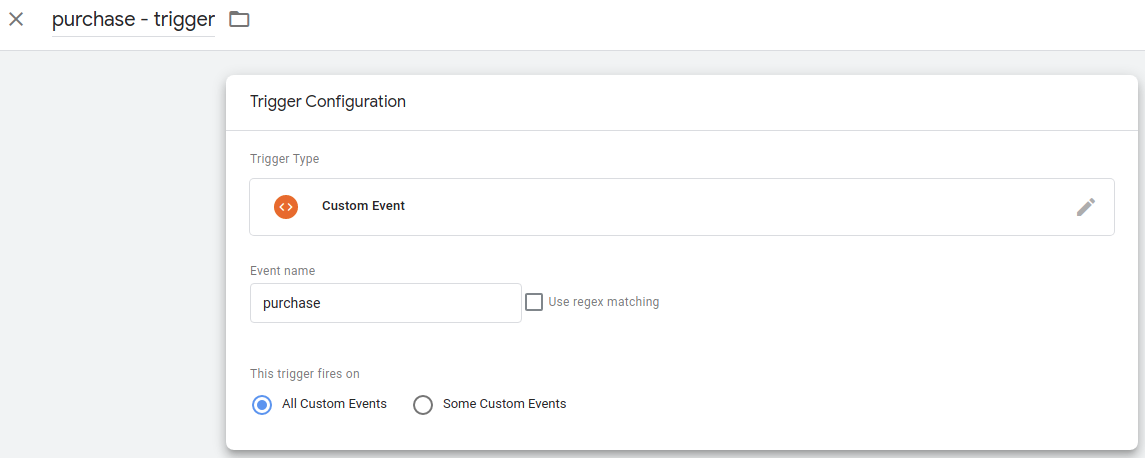
The last step is to create a trigger and a new tag. The trigger fires on the purchase event:
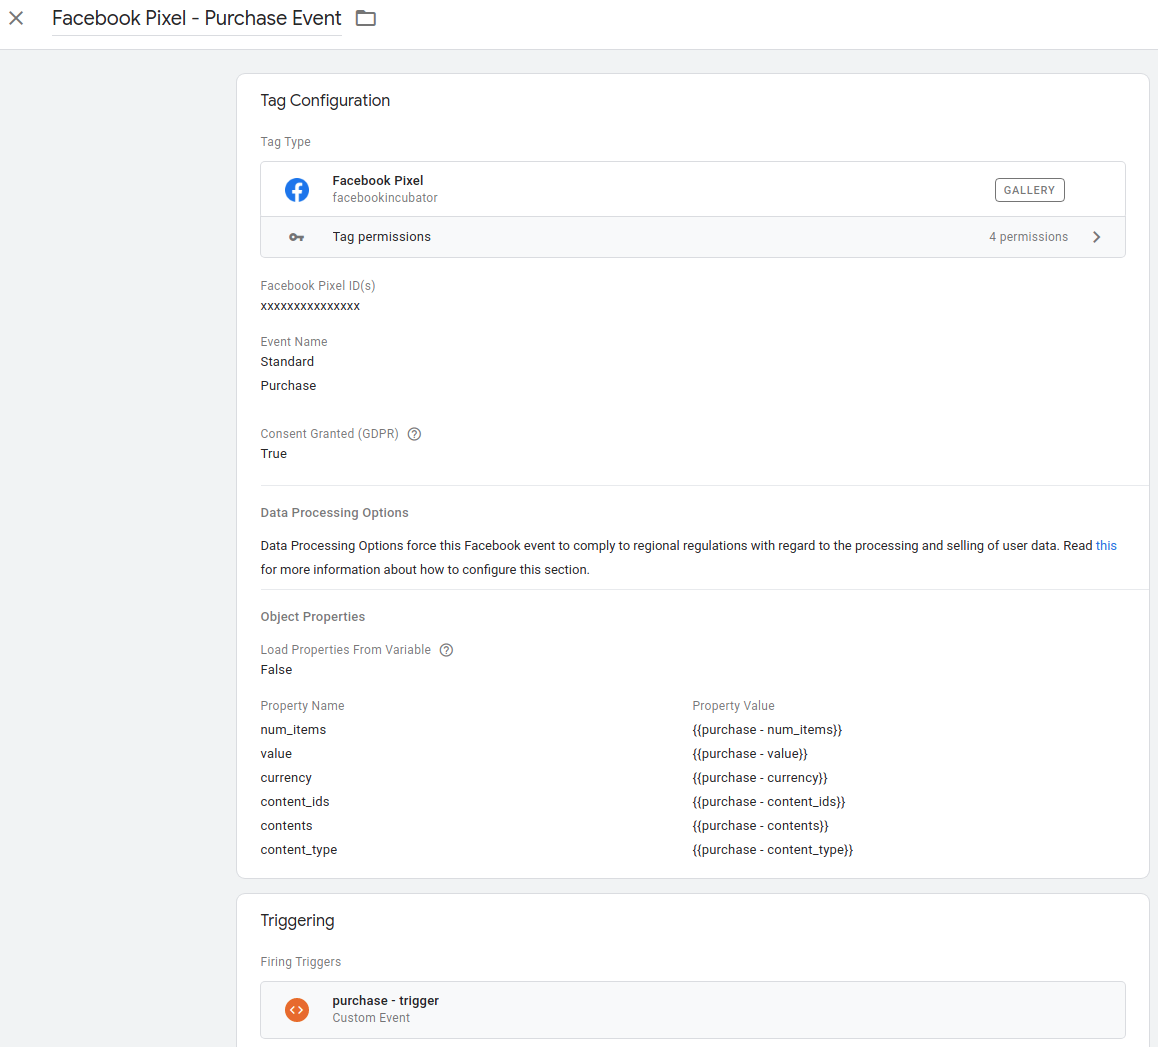
And here's the purchase event configuration in GTM:
And that's it. It's not an easier way than what I've shown you the last time, but this approach empowers the marketing team. They can use the same data layer to send purchase events to some other analytics service, like for example to Google Analytics without having to ask you to code something.


