In this article, we are going to find out just how easy is to integrate the Facebook Pixel with a webform. This can be useful for example if you are using webforms for a quick checkout instead of using the full checkout flow that Drupal Commerce offers.
We are going to cover integrating Simple Facebook Pixel module with a webform. Our example will use the purchase event, that is used for conversion tracking. Having the Facebook Pixel on your e-commerce website is an integral element to the success of your Facebook ad campaigns, so if you don't have it installed already, you can install it with Composer:
composer require drupal/simple_facebook_pixel
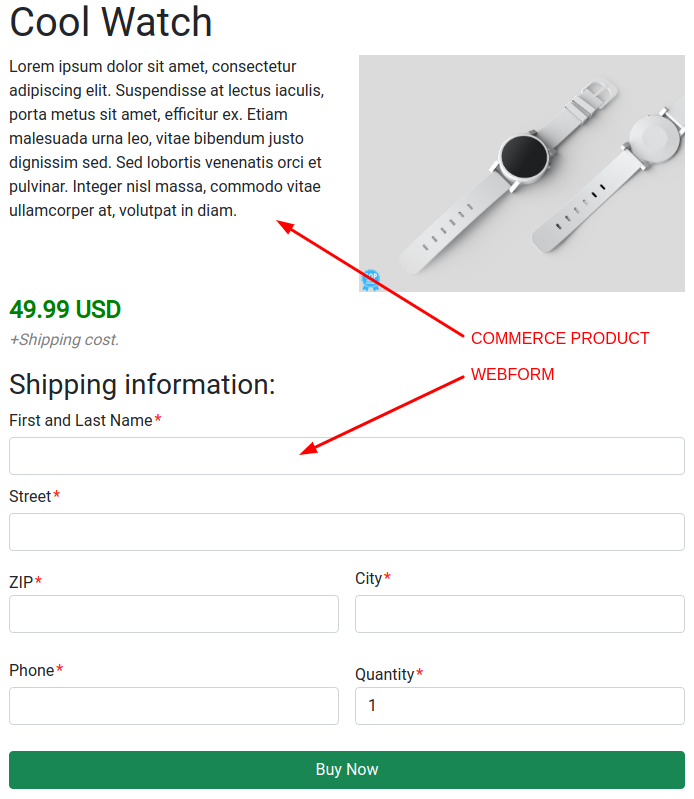
So, let's say that you have a regular Drupal Commerce product and a webform created to provide a quick checkout for your customers. That might look something like this.
Webform is an extremely flexible module. To hook into the submission process (when the user clicks on the Buy Now button) all you have to do is to write a simple webform handler plugin. This plugin will only have the postSave() method, that acts on a saved webform submission.
This is so much cleaner way than having to use form alter hook to provide additional form submit handlers.
Simple Facebook Pixel comes with a service, so integrating these two modules can be done pretty simply and without hacking. Here's the plugin.
<?php

namespace Drupal\MY_MODULE\Plugin\WebformHandler;

use Drupal\commerce_product\Entity\ProductInterface;
use Drupal\webform\Plugin\WebformHandlerBase;
use Drupal\webform\WebformSubmissionInterface;
use Symfony\Component\DependencyInjection\ContainerInterface;

/**
 * Fires the purchase event on a webform submission.
 *
 * @WebformHandler(
 *   id = "fires_purchase_event",
 *   label = @Translation("Fires purchase event"),
 *   category = @Translation("Action"),
 *   description = @Translation("Fires the purchase event on a webform submission."),
 *   cardinality = \Drupal\webform\Plugin\WebformHandlerInterface::CARDINALITY_UNLIMITED,
 *   results = \Drupal\webform\Plugin\WebformHandlerInterface::RESULTS_PROCESSED,
 *   submission = \Drupal\webform\Plugin\WebformHandlerInterface::SUBMISSION_REQUIRED,
 * )
 */

class PurchaseEventWebformHandler extends WebformHandlerBase {

  /**
   * The Pixel builder.
   *
   * @var \Drupal\simple_facebook_pixel\PixelBuilderService
   */
  protected $pixelBuilder;

  /**
   * The route match.
   *
   * @var \Drupal\Core\Routing\RouteMatchInterface
   */
  protected $routeMatch;

  /**
   * {@inheritdoc}
   */
  public static function create(ContainerInterface $container, array $configuration, $plugin_id, $plugin_definition) {
    $instance = parent::create($container, $configuration, $plugin_id, $plugin_definition);
    $instance->pixelBuilder = $container->get('simple_facebook_pixel.pixel_builder');
    $instance->routeMatch = $container->get('current_route_match');
    return $instance;
  }

  /**
   * {@inheritdoc}
   */
  public function postSave(WebformSubmissionInterface $webform_submission, $update = TRUE) {
    if ($this->pixelBuilder->isEnabled()) {
      /** @var \Drupal\commerce_product\Entity\ProductInterface $product */
      $product = $this->routeMatch->getParameter('commerce_product');

      if ($product instanceof ProductInterface) {
        $submission_data = $webform_submission->getData();

        /** @var \Drupal\commerce_product\Entity\ProductVariationInterface $product_variation */
        $product_variation = $product->getDefaultVariation();
        $skus[] = $product_variation->getSku();
        $contents[] = [
          'id' => $product_variation->getSku(),
          'quantity' => $submission_data['quantity'],
          'item_price' => $product_variation->getPrice()->getNumber(),
        ];

        $data = [
          'num_items' => $submission_data['quantity'],
          'value' => $product_variation->getPrice()->getNumber() * $submission_data['quantity'],
          'currency' => $product_variation->getPrice()->getCurrencyCode(),
          'content_ids' => $skus,
          'contents' => $contents,
          'content_type' => 'product',
        ];

        $this->pixelBuilder->addEvent('Purchase', $data, TRUE);
      }
    }
  }

}
As you can see, we are checking if the Pixel is enabled and if we are on the Product route. Then we are getting webform submission data and building the pixel data array that contains information about the purchase. Now that we have everything we need, we are calling the addEvent() method on the Pixel Builder service and passing the event name (Purchase) and data.
Most of the data we need to pass to the Pixel Builder service comes from the Product, like SKU, Price, and Currency. Only Quantity comes from the webform submission.
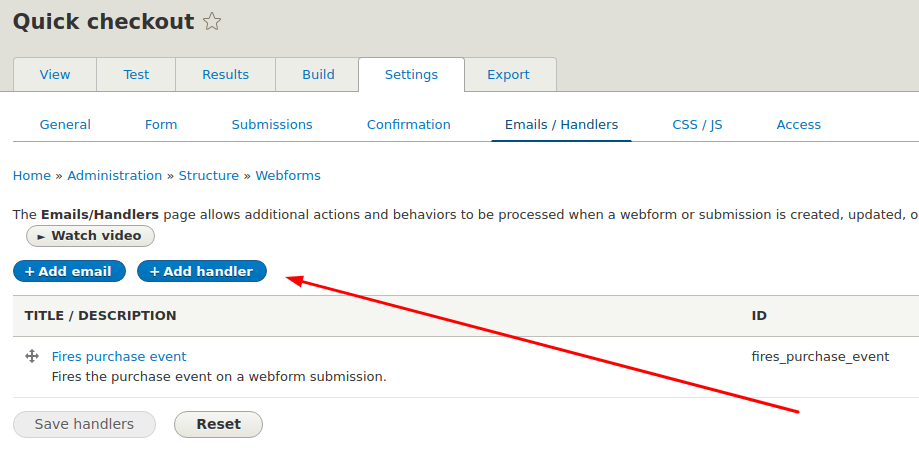
After adding this plugin to your codebase, clear the caches and configure it by going to the Emails/Handlers setting of your webform and clicking the Add handler button.
And that's it. On each webform submission, the purchase event will fire and send data about the purchase to Facebook. You can use tracked conversions to define custom audiences for ad optimization, and this can significantly increase the number of conversions. In other words, you will sell more products and earn more money.
Integration via Google Tag Manager is covered in the follow-up article: Integrate Facebook Pixel and Drupal Webform via Google Tag Manager


